Tuesday, May 31, 2011

granola costs HOW much?

Shopping this week led me past a display stand of "artisanal" breads and granolas. The price breakdown showed that the cost of granola was almost $6 a pound. HOW much?! No, it did not make its way into my shopping basket. Neither did our usual big brand name standby.

When I got home, I broke out the granola recipe I found several years ago in a magazine. I immediately remembered why I hadn't made a second batch. It called for 3 or 4 different kinds of grains and other hard-to-find ingredients, and a dazzling assortment of nuts and dried fruits. I remember paying handsomely for assembling all those ingredients the first time, and the resulting granola wasn't really all that good. We went back to buying the standard Quaker granola which Sam's Club had obligingly started carrying in large sizes. That worked out fine for a couple of years. Recently, however, Sam's switched to carrying the fruity/nutty "improved" version of Quaker granola, with dried apples that taste like cardboard. . . .

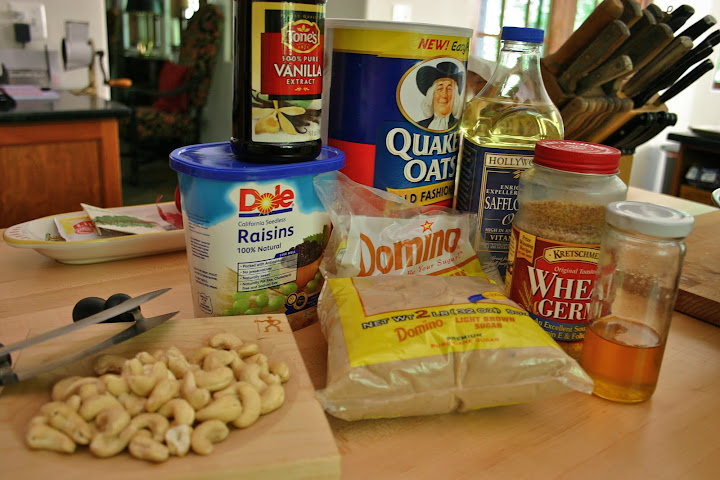
OK. Time to revisit home-made granola. I threw out all the old stale ingredients I found in the back of the pantry and did some research on granola recipes. Here's what I ended up with, and believe it or not, I had all the ingredients already on hand! 2 cups rolled oats (not instant)
1 cup raw cashews (others use almonds, peanuts, sesame seeds, sunflower seeds – experiment!)
½ cup coconut
¼ cup wheat germ
½ to 1 cup raisins (or combination of other dried fruits – apricots, dates, craisins, dried pineapple)
scant ¼ cup good cooking oil (not olive) (you could substitute butter – ¼ cup is a half stick – but must be more careful with storage so the butter won’t go rancid. . . )
½ cup honey – or brown sugar – or combination of both
(and the best combination is ½ cup honey and ½ cup brown sugar. I know; I know!)
dash of vanilla

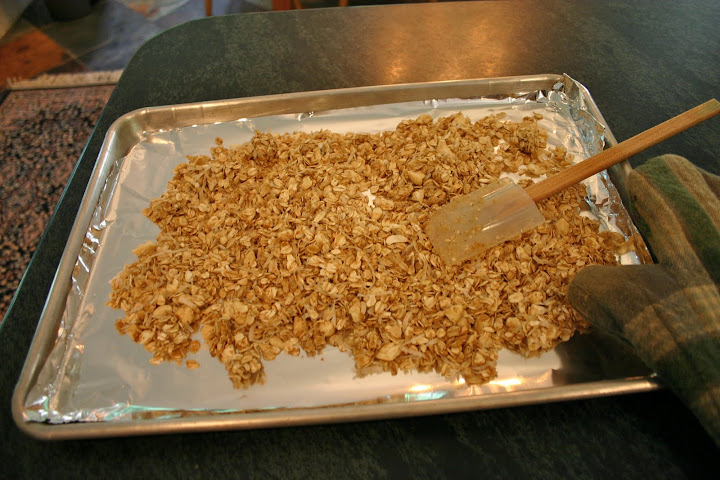
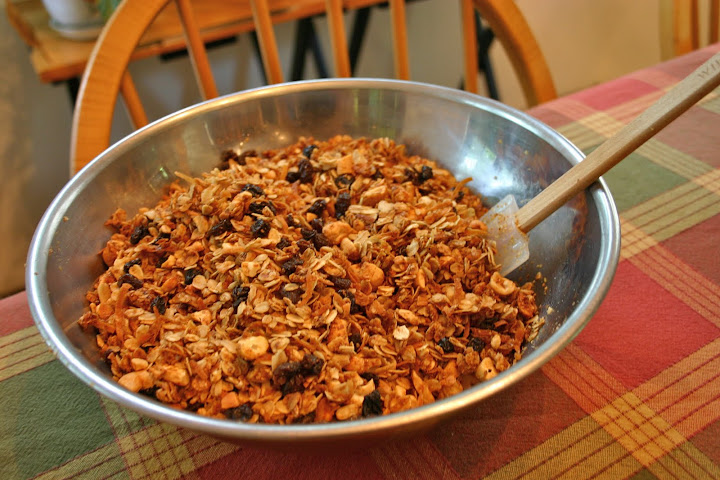
Mix the oats, nuts and grains in a large bowl. Measure oil into the measuring cup (oil first, then honey) and then measure the honey into the same unwashed cup - the oil slides the honey out! Dash in some vanilla and toss everything together until evenly coated (Note that the dried fruit will be added after baking). At this point, you will be questioning your decision to make the granola, which looks pretty bland, dry and highly uninteresting. Stay with me. It gets better. Spread onto a baking pan lined with parchment paper or foil. It's best to use something with a bit of a lip to it, so you don’t make a mess when you’re stirring the granola during baking. I use half sheets, as you see.

Bake at 300 degrees for 30 minutes (or more), turning it with a spatula every ten minutes or so. Things start smelling really good about 20 minutes in. You want everything to be an even golden brown, so don't take it out the minute it starts smelling good! Watch carefully the last few minutes, as it will start to brown rapidly.
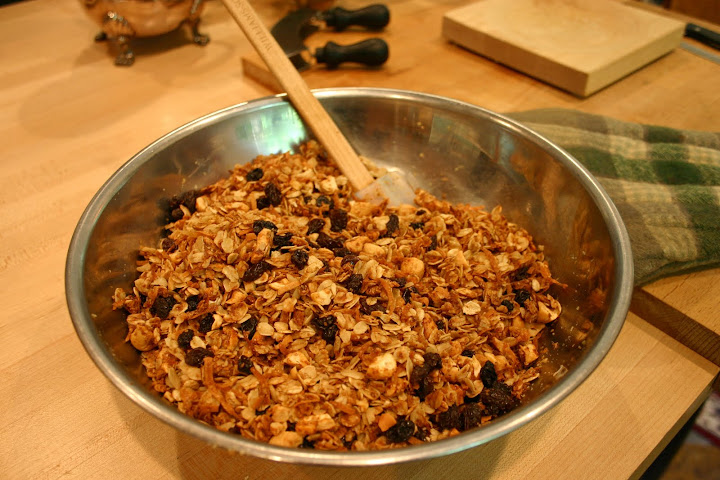
When it is finished cooking, return the baked granola to the mixing bowl, add your raisins or other dried fruit and stir to combine. Stir gently several times more as it cools, so it won’t clump together too much.

This stuff is good. Better than anything I've gotten at the store - and SO easy to make! I make it in double batches now.

Here's a printable recipe. What variations will you make?

Sunday, May 29, 2011

War, Basil and Dragons


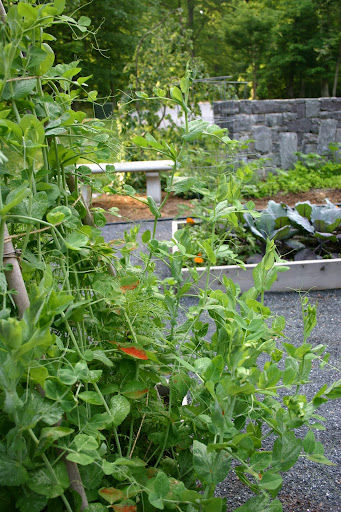
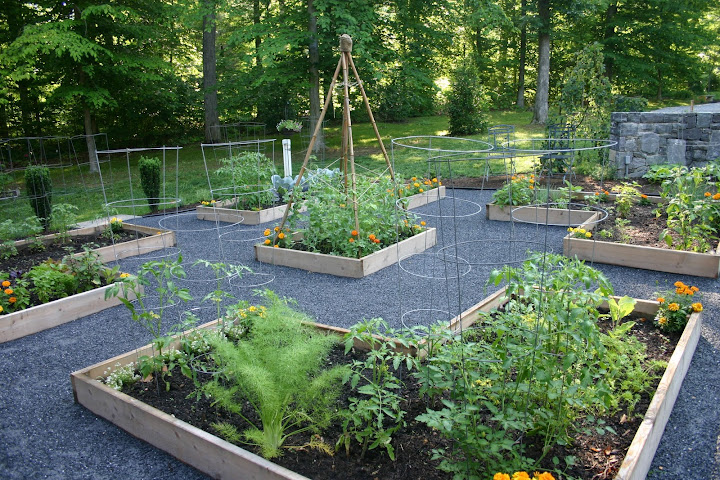
The garden is doing well.

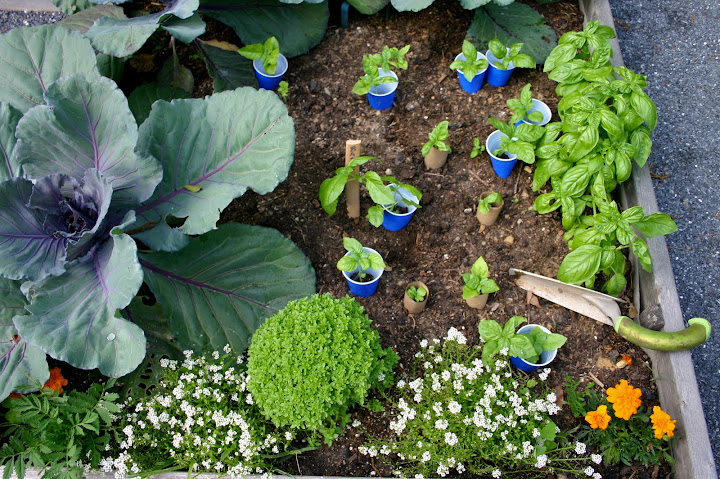
After 3 days in a row of almost 90 degree weather in April, I disregarded the conventional wisdom of waiting until Mother's Day to set out tender plants. I just couldn't help myself. I came home with six-packs of tomatoes, basil, cabbage, brussel sprouts, cauliflower, and romaine lettuce. Beans, sugar snap peas and radishes went in by seed. [Note to self: if the radishes don't improve next year, that's three strikes. No more.]

Today, Memorial Day weekend, found me looking at my weather stick which is moving towards predicting rain (just beginning to point down), but having to water the garden and new transplants all the same, as the clouds just scudded by, with no rain. While watering, I regret to report that I attacked a dragon fly with the hose. He tried to land on my shoulder without warning and without filing a flight plan. Sorry about that.

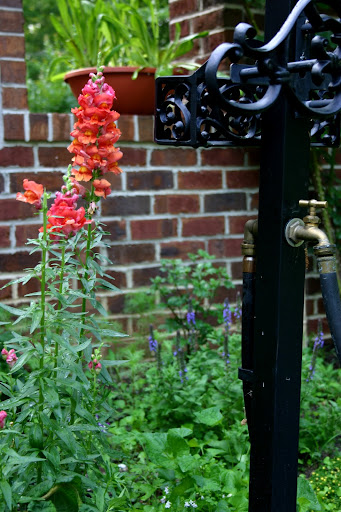
In other garden news, it appears Luther decapitated several snap dragons. He was lucky he had returned indoors by the time I discovered his fell deed. . . .

I never knew snap dragons returned every year! I planted these the first year we moved in.

This stand is particularly vibrant.

I do hope Luther will not make a habit of snapping their heads off.

Continuing in a war-like dragon theme, something has been attacking the basil. Every morning for 4 or 5 days now, I discover a basil plant sheered off and lying on the ground, with bite marks on the leaves! What dastardly creature is doing this? The king has named him Basil Wrath-bone. I went to work.

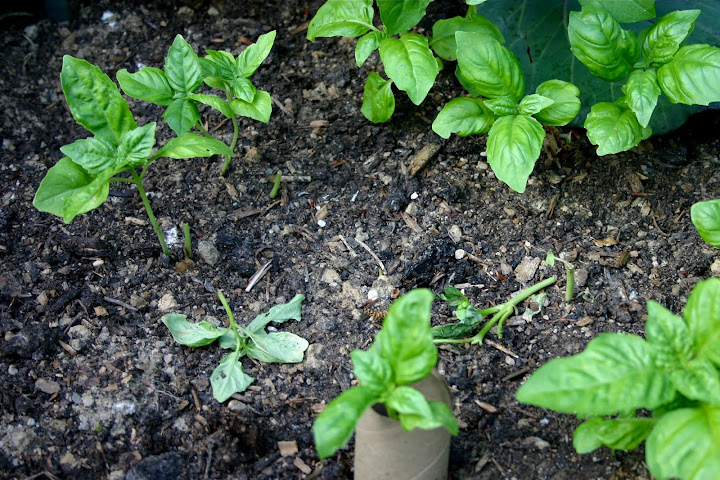
Research reveals that the prime suspect is a cutworm. We had finished a roll of paper towels, so I used the cardboard tube as a collar for the smaller plants, meaning to adapt something else for the larger plants. Tin foil was suggested.

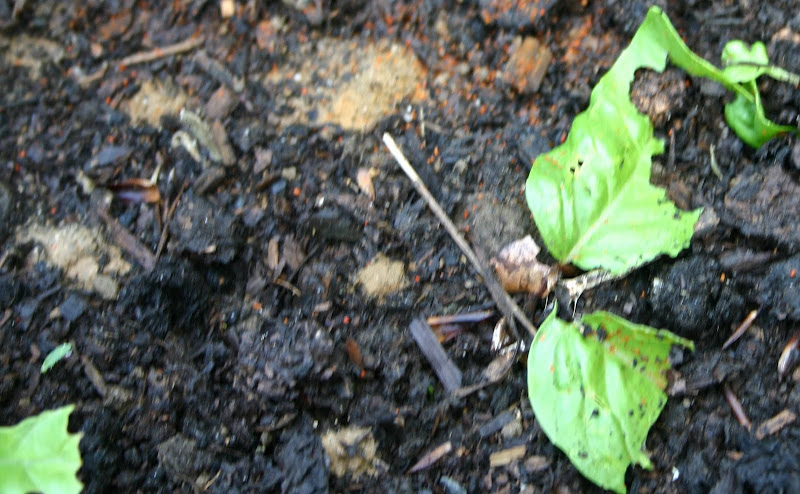
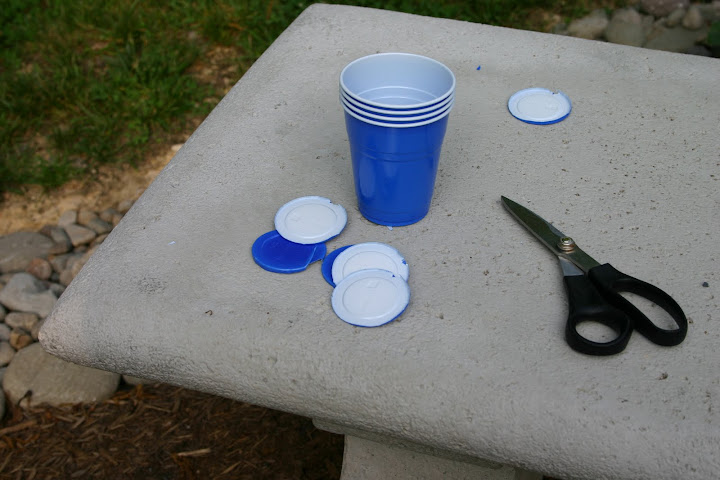
This morning, Mr. Wrathbone had struck again. Here, a close up. See the sheered off stems? I cut the bottoms out of some plastic cups and ran them over the rest of the seedlings.
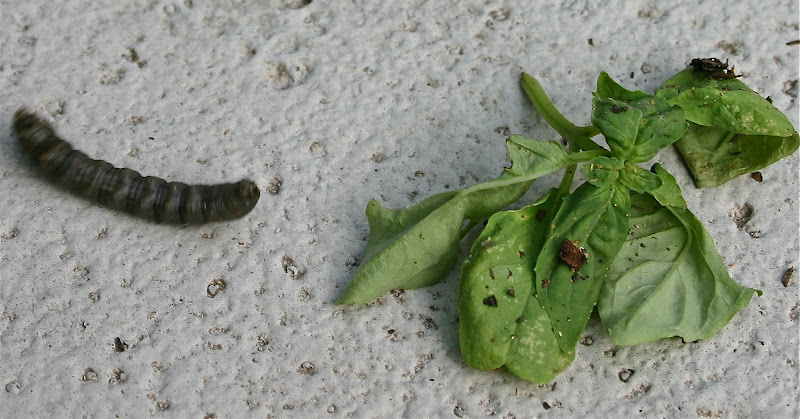
In the process, I transplanted some seedlings into the war zone, and believe I have now found the culprit! Here he is is, a black cutworm.
They move surprisingly fast. After his photo op, he was bisected by the trowel.

I know, it's a cruel world.

Meanwhile, almost all of the smaller basils now have little anti-Basil Wrathworm collars.
I've left a few teensy basils out there as bait. If they go, I'll dig under the surface to find and dispatch the miscreant. Apparently, they won't attack the larger plants, so those are safe.

Moving on. I am amazed at the size of the cabbage. They are almost 3 feet across. I'm on the lookout for fireflies (no sign yet); we have green tomatoes (duly cayenne peppered, given last year's experience!); and the sugar snap peas are twice the height of last year's, but no blossoms until just this week. They're all also cayenned to within an inch of their lives. I am not growing food for the deer.

I'm not growing watermelon either, but dinner tonight is wine and watermelon. A good choice for a hot summer night.

Wednesday, March 16, 2011

planning the garden

This year, there will be two additional considerations to the garden planning: deer and money.

Deer, because the dratted beasts found the garden last year and even bit off the tomatoes, which they then did not eat.

Money, because buying lots of plants the silly deer then eat is expensive, but buying herbs and vegetables from the local supermarket is even more so! More than ever, I am determined to carve out some sort of a producing and productive garden which will find its way onto our plates and into our bellies.

By way of lessons from last year, unless and until we get a 10 foot fence around the place, I will have to keep the cayenne pepper on hand to apply to bean plant leaves, green tomatoes and day lilly buds. Reapply after rain.

Cucumbers and zucchini are safe bets, but get more germander to plant around them to bring on the bees. More bees, more pollination; more pollination, more fruit. I may have to learn to like zucchini this year. A year or two ago I learned to like tomatoes, so what's the big deal, I guess? Still, I can't believe my palate is being determined by what the deer won't eat!

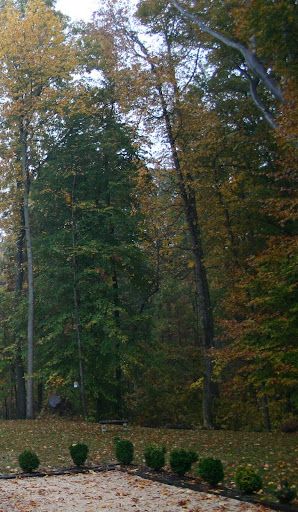
Speaking of germander, I may be substituting it for the boxwood which have done pretty much nothing since they were planted several years ago. Several have died, which maybe is something, but the rest have stayed absolutely the same. No growth whatsoever. That's unnatural. It seems clear they're not crazy about the place.

The deer leave them alone, so that's a point in their favor. But otherwise, they just look kind of silly: small little green dots that have failed to grow up and fill in. . . . Maybe I'll put little germanders in between each and see what happens. They'll either take over, or encourage the box to get growing!

I think I might also have to acknowledge that lavender is not my best choice for these conditions. I keep replacing the ones that turn black and die. Instead, I need to find something that will thrive there instead of torturing more lavender! I do have one or two places where they've hung on, so I might keep the lavender that have survived but put - hey, germander seems much on my mind - I'll put germander wherever the lavender have failed and see what happens!

Next up: planting all the seeds I saved from last year. I'm already a month behind. . . .

Tuesday, March 15, 2011

learning to knit


Overheard this weekend at the Greenwood:

"How long have you been knitting, J__?"

"About 20 minutes."

"No, I mean how long have you been knitting? When did you learn?"

"20 minutes ago. Queenie just taught me."

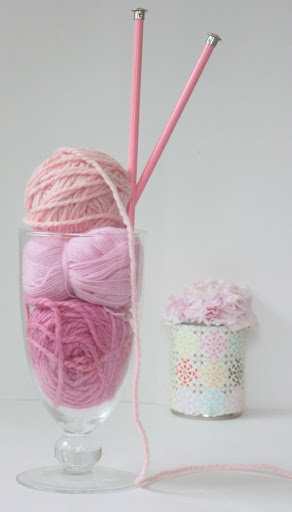
I don't think I've ever taught a more apt pupil. (Sorry, M__. You may have been surpassed. We'll see.) In any event, J__ showed up, large with child, bearing her "knitting" supplies, which turned out to be pink acrylic and an assortment of crochet hooks. I explained the difference, produced some knitting needles and was silent about the colour choice, given the expected boy. Yes, there are two girls already. Either she - or he - will get used to it.

She mastered holding the yarn and needles at the same time right off, a trick I've seen people struggle with for weeks. I had cast on - and knit - 25 stitches, with the idea that we would start small. If enough 4x4 squares were produced, we could always make a baby blanket. If not, at least she would get a few rows under her belt, without bogging down in the middle of a 125 stitch row!

"I'll show you how to cast on later, when [silently:"if?"] you start your second square. Let's get you started with the knit stitch first, before you worry about casting on, which you won't do as often."

I demonstrated. Then, handed her the needles.

It wasn't completely clear sailing from then on - there were several "adjustments" - but 20 minutes later, J__ was struggling manfully with several inches of knitted fabric to show for it, and looking every inch the knitter! Especially to one who doesn't knit himself (the king) who was the one who asked how long she had been knitting.

By the end of the weekend, there were two (almost 3) finished squares. (Oh, and she'd learned to purl as well!) I demonstrated the mattress stitch to sew the squares together, describing other alternatives, and sent her home with a spare yarn darner. She promises to send pictures.

Nana taught me to knit when I was probably 4 or 5, the same age as J'__s eldest. Maybe J's girl will learn on the next visit, which won't be until well after her brother is born.

What I didn't learn until many years later was how to finish my projects. I would get bored with them and put them aside. Sometime later, I'd start a new project, rather than finish the one I'd started a year or more earlier and was heartily sick of. Thus, I had a lot of knitting experience, but not so many knitted objects to show for it.

One finished object I do remember was the knit suit I made for the queen mum. Yes, "suit". There were two immediate problems with it: one, it was made of acrylic. A lovely brown "tweed", but acrylic. Second, the cast-on edge for the pullover top was too tight. It was almost impossible to pull on/pull off. A third problem - had anyone ever actually worn the thing - would undoubtedly have been that it was way too warm to wear anywhere south of the North Pole.

That was over 30 years ago. I have learned several things since then!

First, if you're going to spend all that time making something by hand, work with the best materials possible. For me, that usually means natural fibers. Yarns for hand-knitting are becoming ridiculously expensive these days, but there's little sense in spending months knitting an acrylic "tweed" suit! A good source for inexpensive basic yarns in a rainbow of colours is Knit Picks. I have also been known to keep my eye out for otherwise ugly sweaters (XL if possible!) made from fine materials on sales racks or in thrift stores. You have to be careful about that, though, because some sweaters are actually made from knitted "cloth" which is then cut and sewn together, and which can not be unraveled into a single long strand and recycled into another knit garment. The 'cut' kind unravel like the warp/weft of cloth, into short un-reusable lengths. The better sweaters are usually piece-knit, and can be unravelled. One learns to tell the difference, but I still won't pay much more than a few dollars for a sweater I intend to recycle into wool. There are too many variables and uncertainties.

Second, "fix the problem"! Again, if you're going to spend all that time making something by hand, don't let it languish in a drawer because the neckband is too tight! Take scissors to it, if necessary. There's a lady called Elizabeth Zimmerman (often referred to as EZ by knitters) who really changed my whole attitude about knitting. Her book Knitting Without Tears can be summarized by a quote she is famous for: "Knit on with confidence and hope, through all crises!"

She just didn't get upset about anything. She also didn't let her knitting rule her; she ruled the knitting! There's a difference. Learn it.

What I would do now about the too-tight cast on edge would be to cut it off (yes, using scissors), pick up the stitches and re-knit it (going the opposite direction) and then cast off using Jeny's surprisingly stretchy cast-off binding. Elizabeth Zimmerman liked the sewn bind-off, but I have learned from her to use what I like. I think she would have liked that.

Fixing the problem means re-positioning the buttonholes, or ripping out the wierd peplum, or changing the turtleneck to a boatneck if the yarn makes you sneeze, or lengthening the arms, or any number of other adjustments you know need to be made if you're actually going to hope to wear the item. You know the problems the minute you put the garment on. Fix it! Or get rid of it.

About finishing projects. . . . well, the more projects you finish, the easier it becomes to finish them. I don't know why that is, but it is. Write it down.

There are a host of knitting resources available now on the internet. Some of my favorite sites are Ravelry and Knitty, and through them, you will come across a bevy of knitters, designers, bloggers and videographers who have posted amazing material dealing with just about every technique or problem you could ever dream up. You will come across names like Jared Flood of Brooklyn Tweed and Shelter yarn, which I plan to spring for, one day soon. There's Stephanie Japel, who I first met when she knit and designed and blogged under Glampyre Knits. There's Norah Gaughan and TechKnitter and Ann Hanson, who knits, designs, cooks and gardens. (and has a logo involving a skewered martini olive on a knitting needle. Gotta love that!)

I haven't even touched on what's available on YouTube!

But I've reached the end of my concentration span and in the spirit of finishing projects, I'm going to finish up here, and hit "Publish Post". I have noticed that I haven't written much lately. Too much knitting! [grin]

Talk soon.
Wednesday, February 2, 2011

What is it?!

The queen-mum is back from her latest foray, this time to foreign southern climes of the Puerto Rican persuasion. She sent this photo, which I thought bordered on mean. But as I loved looking at it anyway, how mean could it be? So pretty. . . . and yes, we were also invited. . . .

Anyway, she came back with her usual largesse from the local markets. Knorr makes instant garlic cubes! [who knew?!] But apparently they sell them only to Spanish speaking countries. That's ok. I like my garlic in garlic paper. You know, the regular papery garlic cloves in the original, natural package. I have a whole ritual I go through, selecting and preparing them. Somehow it wouldn't be the same to take a little cube out of a box, no matter how cute the box!

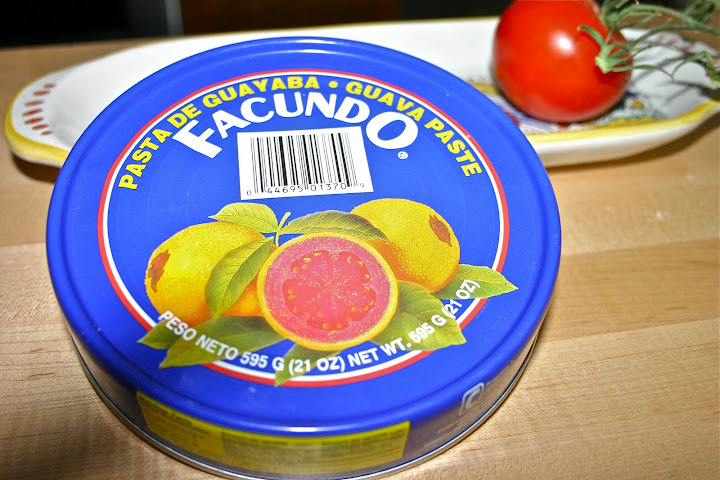
Speaking of packaging, this - um - can - stopped me in my tracks. It's enormous! Probably 6 or 7 inches across, and very colourful, as you see. A tuna can on steroids.
Facundo, Pasta de Guayaba. Thankfully, the translation is right next to it: "Guava Paste."

Guava paste? Why would anyone want guava paste?!

It turns out that this is a very popular item in Puerto Rico. They eat it with cheese and for dessert. It's apparently very sweet. They use it as the filling to stick two little cookies together. Further research shows endless cake, pie, pastry and empanada variations, but also pork and chicken options!

Here's a recipe from Bon Appetit for a Guava-stuffed Chicken with caramelized mango and here a Food & Wine recipe for guava-glazed pork tenderloin with cilantro jalapeno salsa.

And how about this as a dipping sauce for Pinchos de Cerdo - Skewered Pork?

1 cup guava paste (about 12 ounces)
1/2 cup beef broth
2 tablespoons fresh lime juice
2 tablespoons dark rum
salt and other herbs to taste. . . . (combine in small saucepan and heat through, stirring)

I also came across one Anger Burger, who wrote an amusing and in-depth study of the stuff, with lovely pictures. I warn you, Anger Burger's language is. . . . "angry". For those of you squeamish about the odd expletive not deleted, do not go there. For those of you who wish to see what Anger Burger did with his [her?] guava paste resulting in what she says was the best *&^)$%@@ pastry ever, click on this link: "guava paste, you shut up!".

Peaches were involved.

But I'm thinking that dipping sauce, on a seared pork tenderloin. . . . .

Meanwhile, the can looks pretty in the kitchen.

Tuesday, February 1, 2011

hot and cold

One of our favorite family jokes is the one of the simpleton who, when asked to name the most amazing human invention, intoned: "The thermos."

"The thermos?!!!

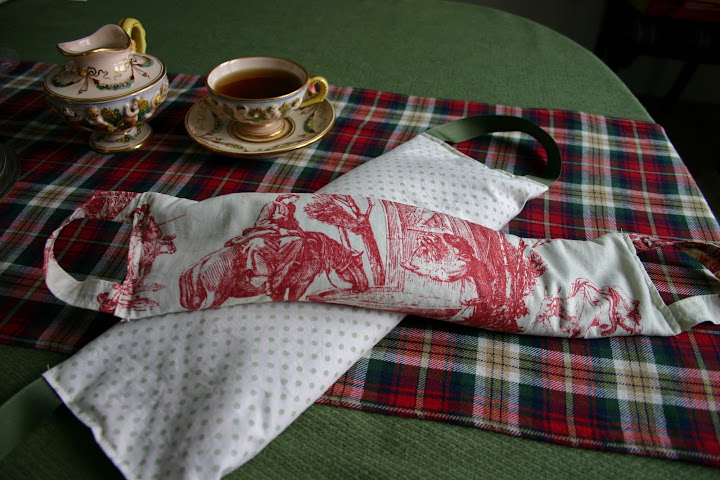
"Yeah! The thermos. You put hot things in it and it keeps it hot; you put cold things in and it keeps it cold. How do it know?!"Well, here is my new amazing hot/cold pack. It's perhaps not quite as amazing as the thermos, but it's pretty amazing for all that. Microwave it for a minute and it provides beautiful heat for almost an hour to soothe sore and aching muscles. Freeze it, and it's an ice pack (minus the hard cubes and moisture of the melting ice) - to soothe sore and aching muscles!

Yes, there are two of them. Although each pack can be used for both hot and cold applications, from a practical perspective, it takes a good deal longer to freeze one of these than it does to microwave it. My current regimen is ten minutes of heat and then 20 minutes of torturous physical therapy followed by ten more minutes of icing. Frozen shoulders apparently need both heat and ice. Anyway, it didn't take me long to figure out that I'd have to have one of these hot/cold packs dedicated to the cold side of things. So I made two.

This is SO much better than a heating pad. They're stuffed with flax seeds, which conform to your body and have a bit of weight to them, so they can easily transfer either heat or cold without you having to press down on the pack to keep it in contact with your skin. But 'how do it know'? Apparently flax seeds have a high concentration of oil in them, and it is the oil that retains either heat or cold, whatever you subject it to. Plus, heating pads are stiff, electrical, and prone to mustiness. Don't even talk to me about ice or frozen pea packs. They are lumpy, wet, hard-frozen, and uncomfortable - and also prone to freezer-must. I find the light aroma of the heated flax seeds very enjoyable and I have been advised to put the cold pack in a ziplock bag, to avoid picking up that stale freezer smell! You take the the pack out of the ziplock when you're ready to use it, as it remains perfectly dry.

These heat/cold packs have really picked up my spirits! It's amazing what a little thing like this can do. Flax seeds. Who would have thought it? I'm actually kind of looking forward to my next range-of-motion torture session. Or at least to the temperature therapy aspects of it. . . .

Sunday, January 16, 2011

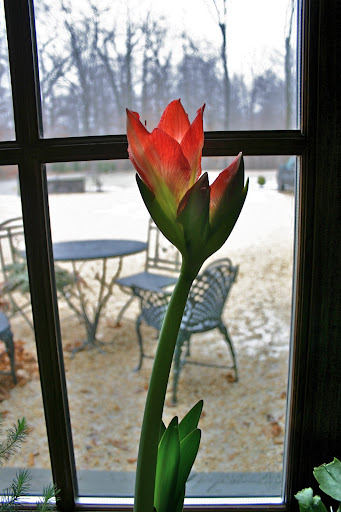
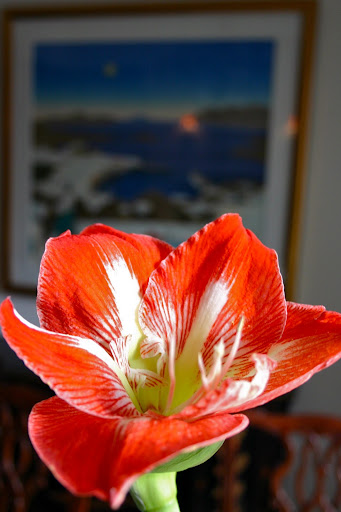
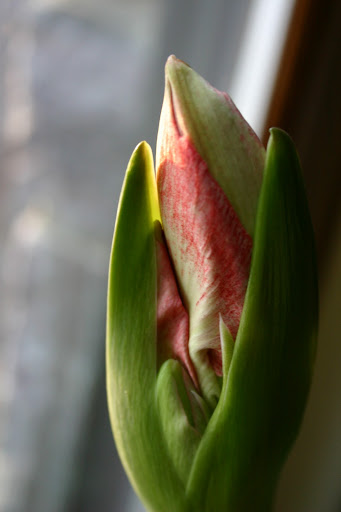
time-lapse amaryllis

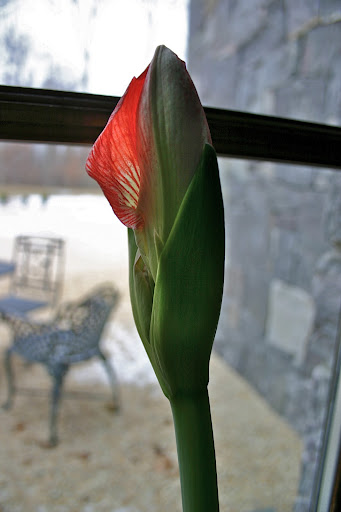
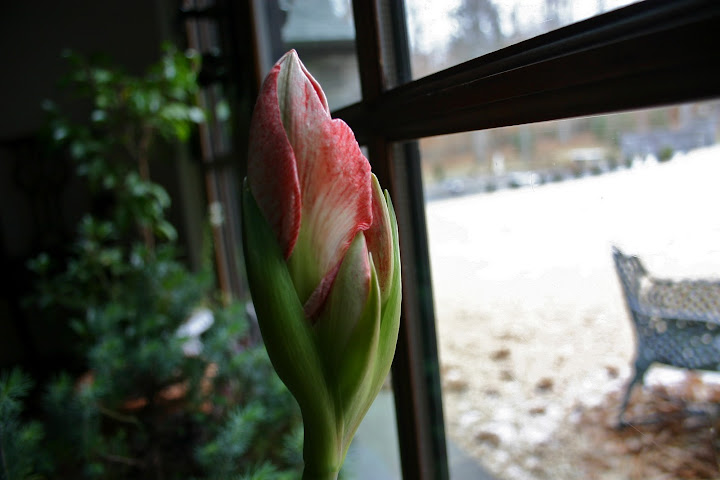
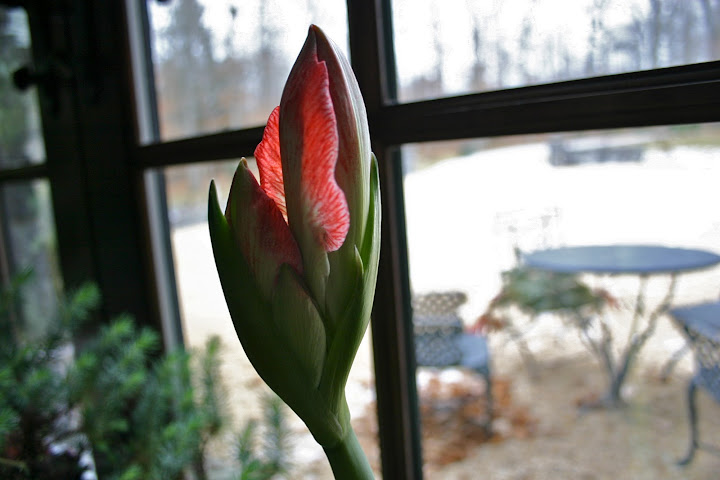
What is it about these flowers that makes me want to record the day-to-day unfoldings of them?

They look like some sort of prehistoric bird beak emerging from an egg. Pterodactyl-like.

This one was a gift from the queen-Mum, who realized she would likely still be out of town (in southern, tropical climes) when it bloomed.

Knowing me, she probably figured pictures would be forthcoming. I've never met an amaryllis yet that I didn't photograph. Or want to photograph, anyway!

Tuesday, December 28, 2010

post-Christmas

The snow is still on the ground, barely, and through the trees I see the red of a huge timber truck loading up enormous sections of the road-side oak recently felled by the utility company. We were worried that a repeat of the 100-year snowfall from last year was about to make a repeat appearance this 101st year! But no. We got all the enjoyment of a snowfall with none of the work. I don't count wiping an inch of snow off my windshield as 'work' - especially when I didn't even have to do that; the king beat me to it!

No, I did not take snow pictures. There are still plenty from last year! (Just click - this link here and it'll all come back to you. . . .)

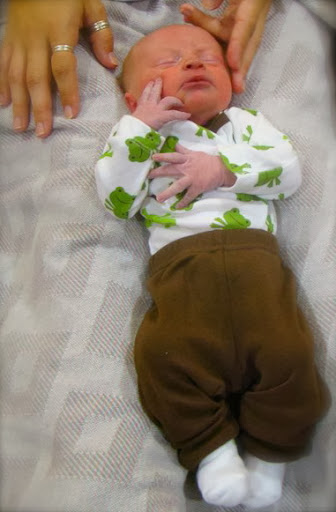
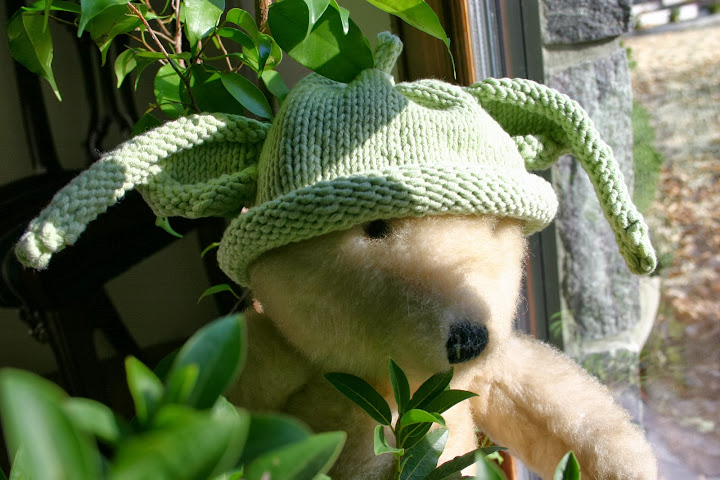
This is the first Christmas with a "grandchild". Meet wee Toto! [not his real name, to protect the poor innocent] He wasn't with us this Christmas, but we got to see pictures. He loved his Ravens jersey and promptly spit up on it. That's love - true love! He hasn't said much about this hat I made him, but his picture is making the rounds of the facebook community. Yoda-baby! Yes, I made it. From a pattern I worked out in my head and tried on Bear, as Toto stand-in. Meanwhile, I've just seen miniature versions for warming easter eggs, masquerading as wee bunnies!

Too cute.

Here's the link to a reference to Debbie Bliss' book The Knitter's Year, which contains the pattern. Toto will likely be festooned with a rabbit version come Easter. . . .

Poor kid.

Wednesday, December 8, 2010

the purge

. . . . in which the queen-mum attempts to poison her offspring.


The queen-mum and her consort have recently returned from their annual world cruise. As is their wont, they return with little treats from the local markets. Spices, condiments and coffees are popular acquisitions and this trip was no exception.

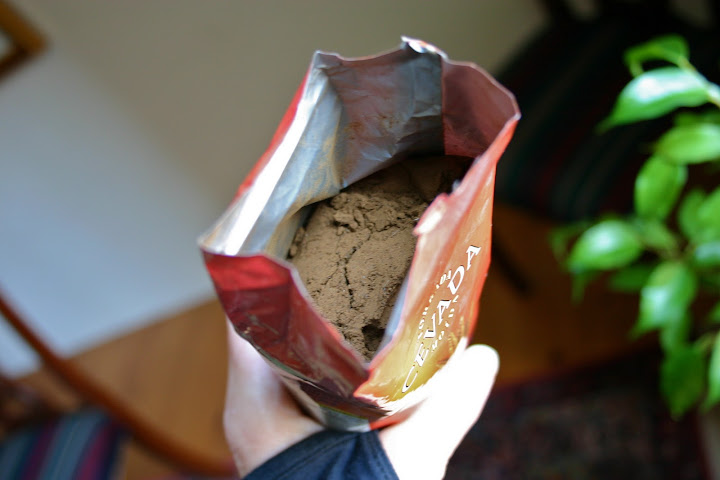
The bottles of Madeira were broken by their bearers (so the entire travel party smelled strongly of the inside of a tavern when they emerged to be picked up), but the seeds and coffee packets survived, as did the black T-shirt with "Barcelona" spelled out in rhinestones. We opened the coffee today.

OK - the king opened the coffee. He's the one entrusted with the secret greenwood coffee recipe! It's a blend, and usually involves a scoop or two of 'foreign' coffee, for colour and flavor.
As he reported: strange colour. . . . Acrid odor.


Flavor? Ah. . . . well. . . .


"Is this coffee?!!"


No ingredients listed.


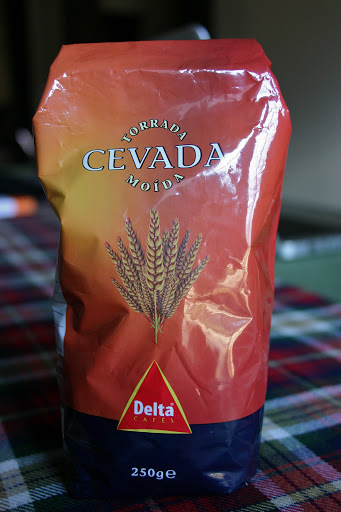
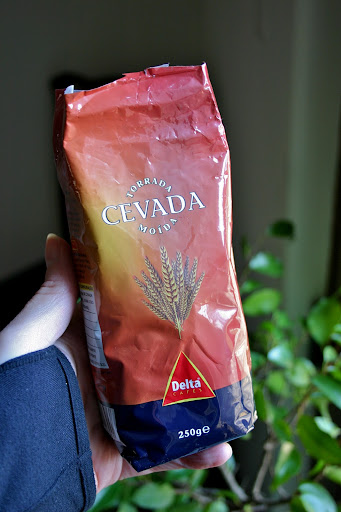
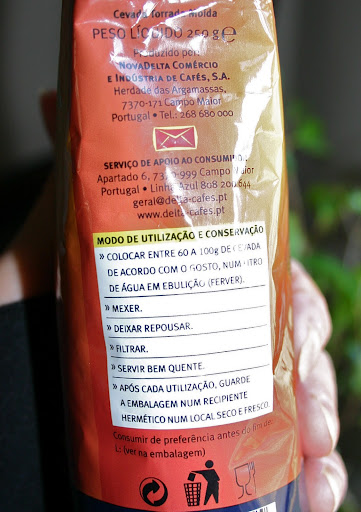
"Hmmmm. There's a picture of some sort of grain on the front. It says Delta Cafes, but why would you illustrate coffee with a picture of grain?"

"I thought it was feathers. . . ."

" 'Cevada - Torrada Moida'. . . . What if that's not the brand name?! Wonder what Cevada means?"

As a word, Cevada is not exactly intuitive. Coffee is coffee, kaffee, cafe; pasta is pasta; and wine is wein, vin, vino. . . . but Cevada? I typed it into a Google search and hit "translate this page".

"Great. We're drinking roasted barley, known for it's purgative and laxative qualities. . . ."

That queen-mum!

Wonder who else got "coffee" from the world cruise? Should we tell them, do you think? [grin]

I guess you could put it on top of your cereal - because it sure ruins a good cuppa coffee!

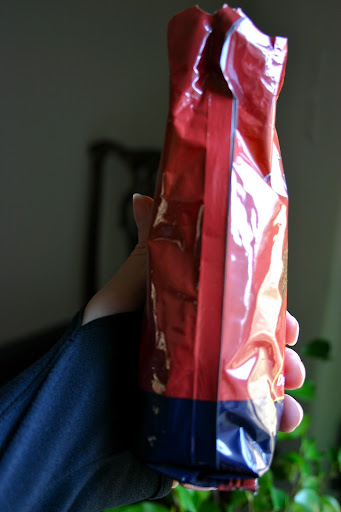
Note the universal "throw this out" symbol next to the recycle one. . . .

Yep. I'm thinking compost.

We'll be roasting her for years over this one. . . . It's almost as good as the basil/pepper mix-up! Live and learn. This was fun. Thanks, Maman. I love you!

Tuesday, November 30, 2010

Les Herbes du Bois Vert

The full 2010 herb crop is (and has been) in.

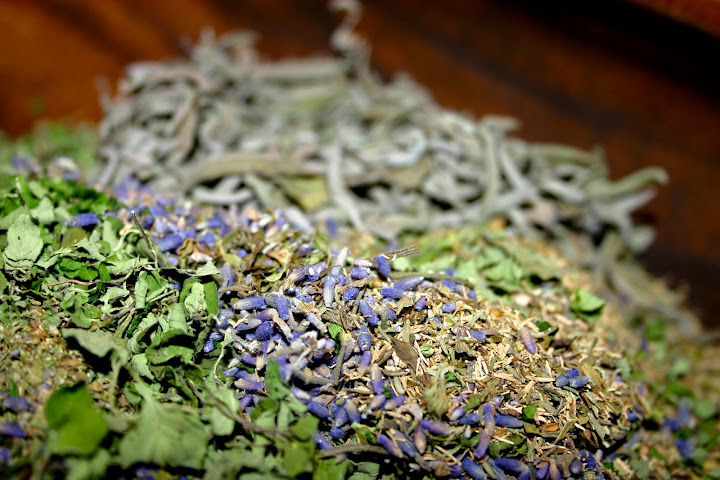
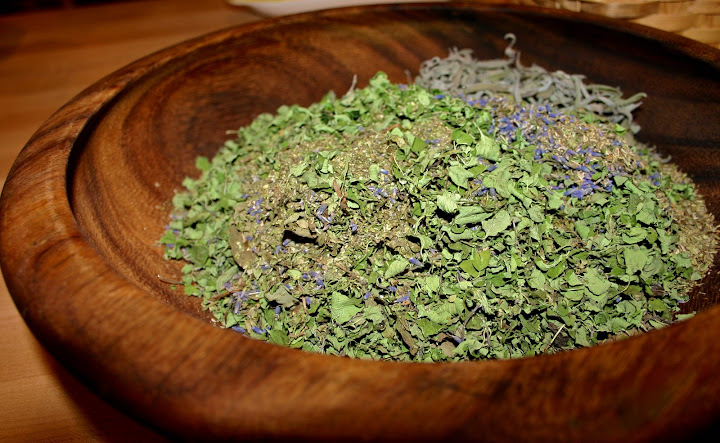
I consulted my notes on the "recipe" for les herbes du bois vert - the greenwood version of herbes de provence - and remembered that it was generally a quarter rosemary, a quarter thyme, a quarter savory and a quarter of whatever else there was (including lavender, tarragon, sage, etc.)

Oh, and I've also consulted with a scholar in Paris, and she advises that the correct phrase would be les herbes du bois vert. So I guess it's not what I'd come up with - herbes de le bois vert - which I'm sure is atrocious grammar, but which had a nice ring to it! I was a little too proud to suggest same to my scholarly source. . . .

This year, what I ended up with (herb-wise) was:

Rosemary ( 3/4 oz. I know there are bags more of it, but where?!)
Savory (1/4 oz. - supplemented with 1 oz. of 'boughten' savory from the local market, my savory languished in the extreme heat this summer)
Thyme (2 1/2 oz.)
Oregano (3/4 oz.)
Basil (1 1/4 oz.)
Sage (1 1/2 oz.)
Lavender (1/2 oz.)
Tarragon and Parsley (trace amounts - less than 1/4 oz. each)

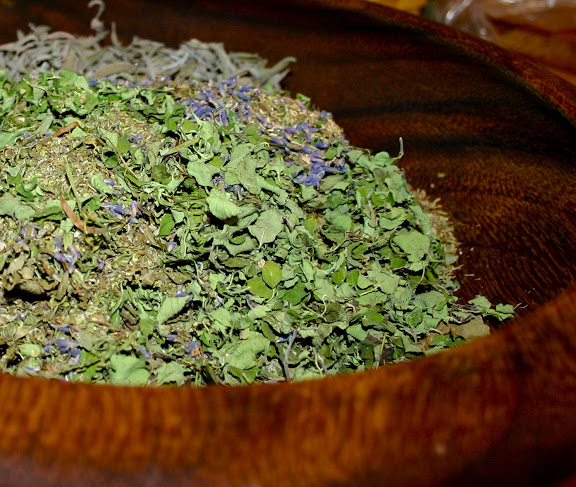
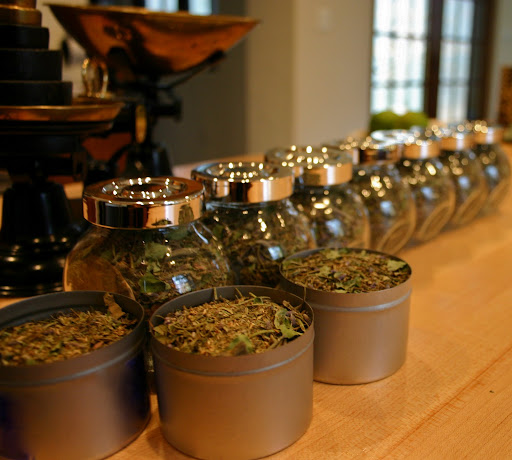
I started out doing the math and ended up just throwing everything into the big wooden salad bowl. It's what there was, this year, so that's what's going in! All but the sage. I'm not crazy about a heavy sage flavor, so I only put a handful of sage in. Here's a close up, and you can still see the sage leaves at the very top. Blended and put into containers, I ended up with more than enough to share and last me through the winter and to the next herb crop! Les Herbes du Bois Vert, 2010.

Finis.
(and that's French for "done!" I think. . . .)

Saturday, October 9, 2010

another year, another potato

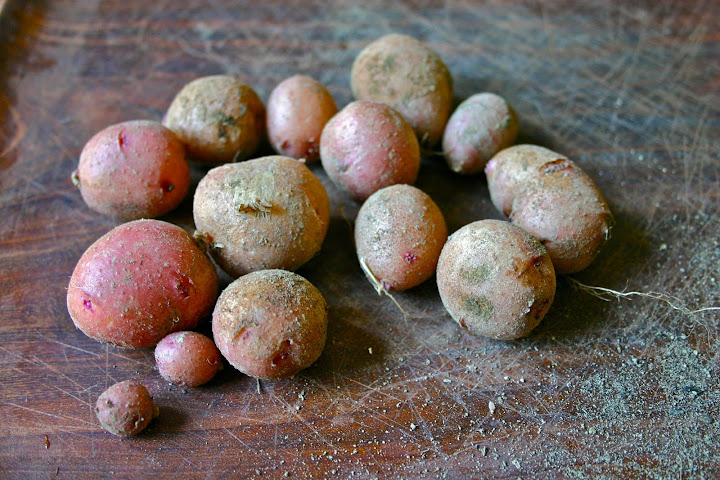
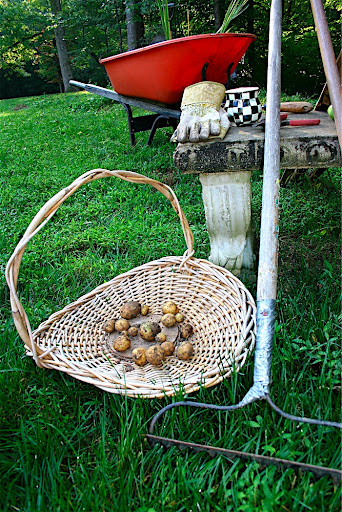
I left the potatoes in longer this year, and put in more plants. It didn't help. Here's the potato harvest this year. Here was last year's. You noticed too, did you?

More potato plants left in longer equals fewer potatoes. They were smaller, too.

Go figure!

Ah well - they were free, and they're pretty red potatoes. I cut up the ones at the bottom of the bag which had started sprouting, let the cuts 'heal' for a few days in the air, and then threw them in the ground. Other than that, I ignored them all summer until just today, when I dug where I hoped I remembered planting them. It's a couple servings. Surely that's worth the planting and the harvesting!

After I'd gotten all the earth turned over and smoothed out again, I took the sprouting potatoes I'd cut up a few days ago and threw them in. Maybe I'll get a fall potato crop? Maybe they just don't like hot weather. . . . Ireland doesn't have hot weather and look what they do with potatoes! The nasturtiums that also flourish over there (and which barely limped along here this summer) have finally started flourishing here, now that the weather has cooled off. I'm going to take that as a sign that this is potato growing weather and we'll see what happens.

Thursday, September 23, 2010

yellow on yellow

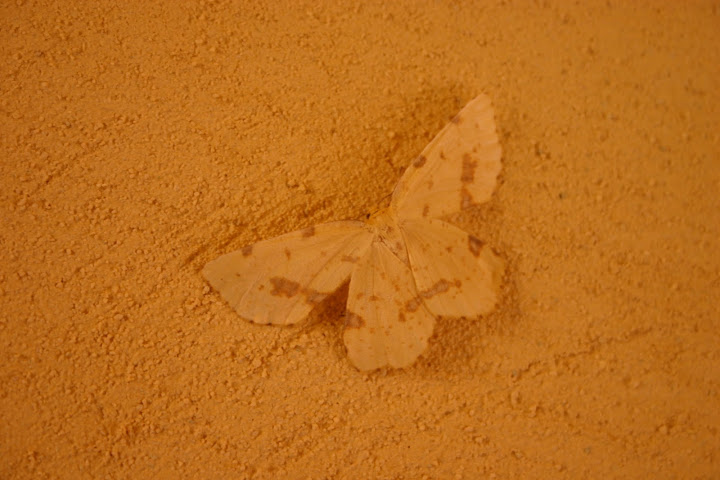
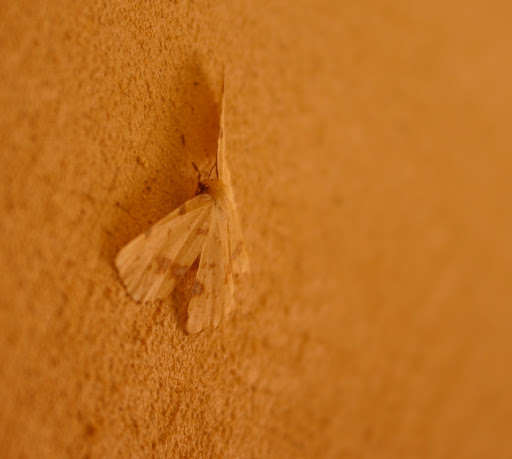
No moths were injured during this photo shoot. No yellow paint was applied. He came that way. Really! Think about it like this: if you were this colour and saw a house this colour, wouldn't you set up residence there? It would be a serendipitous sign I don't know that I could resist. A 'message from God'. . . .

OK. Look. If I had painted this guy, would I have been able to get him the same colour all the way around? Including getting him to hold still long enough to daube on the camouflage spots and get full coverage around the legs and antennae? He'd be a dead bug by then, and this guy is clearly not. See? That's a vertical wall he's clinging to, not a horizontal surface.

Now what sort of bug he is, is anybody's guess. I'm just glad he moved in. Glad, so long as he stays outside! No moths allowed in, to ravage wool socks and sweaters. And that is final. I don't care what colour you are.

Speaking of colour, that's really more of a saffron now, wouldn't you say? Yellow is so generic. . . .

P.S. - thanks to alert reader Tiffany, we now know this is a Crocus Geometer. Thanks to the MagickCanoe, we learn that there are Crocus Geometers and FALSE Crocus Geometers. Who knew?!

Saturday, September 18, 2010

night sky

There is the unmistakable hint of fall in the air. At the same time, a very late firefly has been lighting up in the pasture the last two evenings. I love this time of year.

Wednesday, September 15, 2010

the melon

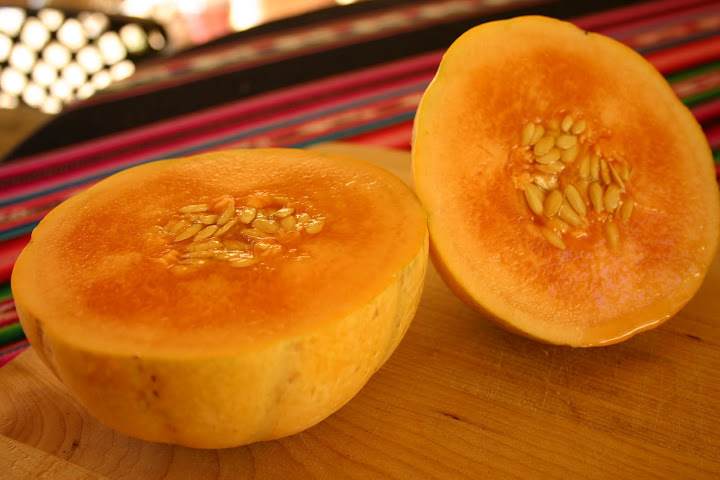
You will have noted the use of the singular.

There was one. It was smaller than it appears in this picture. I say this in the interest of full disclosure, but I do not care to give you a picture proving the fact.

I left it on the vine a good long time, hoping it would get bigger. It did not. I finally harvested it when I could smell it when I strolled past. It was starting to attract the attention of small, boring insects as well, who had just started an attack on the dirt-side of the rind. . . . No matter, though; they didn't get far.

The melon was good, if a bit over-ripe already. And small. I know I mentioned small.

Oh well! I've saved the seeds and will try again next year. I think I'll put them over where the cucumbers grew so extravagantly this year!

[sigh. . . .] I had such high hopes when I first wrote about the melons [heh! melons. . . .] back in May. . . .

Thursday, August 19, 2010

fall slaw

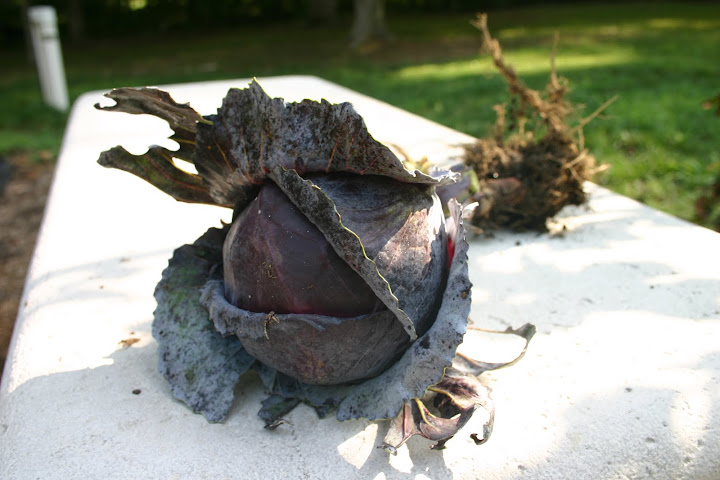
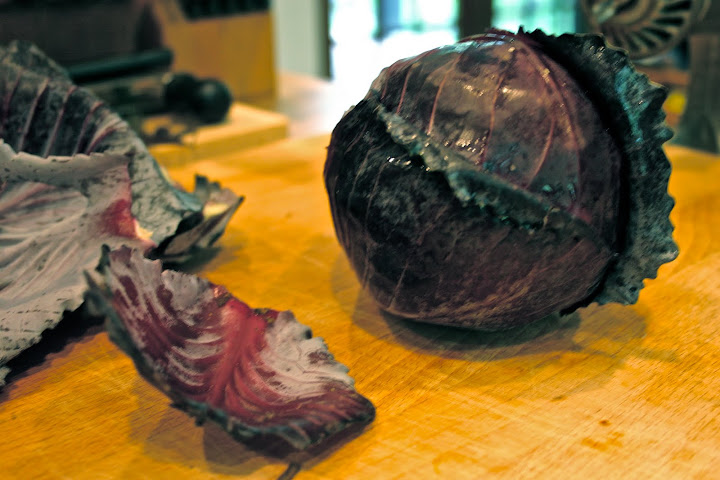
I harvested the first red cabbage. After the lessons learned from eggplants and cucumbers, I began to worry that leaving the cabbage in the ground all summer might not result in a larger head of cabbage, it might just result in a tougher head of cabbage! My fears were not ill-founded. I was not able to cut the cabbage off its cabbage stalk with my garden shears, but had to pull the whole thing out of the ground. It reminded me of the plant in Little Shop of Horrors. You see the resemblance, I'm sure!

It also reminded me of certain old-fashioned so-called cabbage roses. I've always loved that rose form.

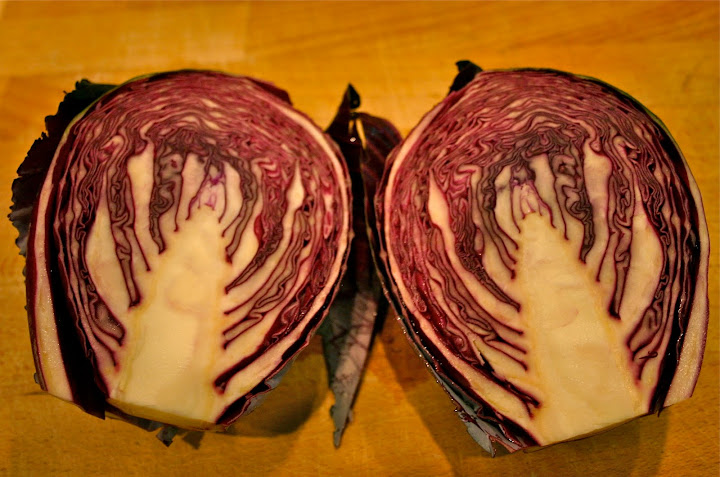
Anyway, one cabbage was out of the ground, tattered outside leaves removed and the stalk sawed off with a big, serrated knife. The moment of truth was at hand. I picked up my sharpest chef knife and prepared to cut the cabbage head in half. My first impression was of a wonderful peppery aroma. I've never smelled anything quite that strong or lovely from a cabbage I've bought in a store. I only hoped that it was not because the cabbage was past-eating; over-ripe! My second impression was of delight in the precise form on the inside. I would love a stamped impression of this, on paper. Actually, I think I've seen a wonderful woodcut of something similar, along the lines of Albrecht Dürer.

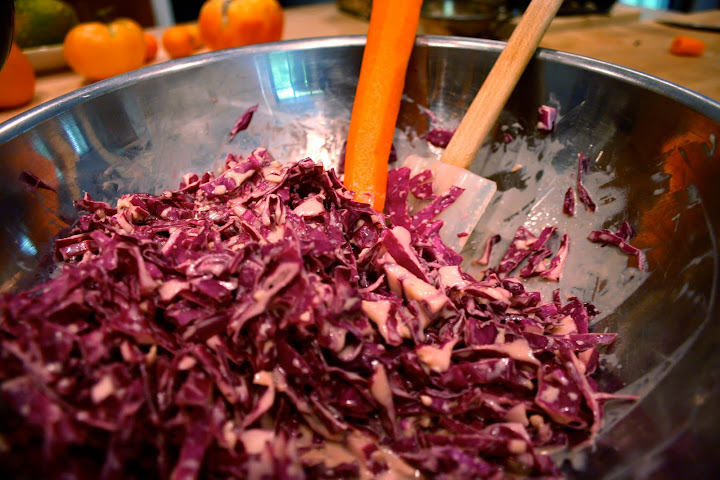
I chopped and tasted. The cabbage is not the tenderest I've ever tasted, but it had a wonderful flavor. When combined with a mustard ginger dressing, it was delicious! This, by the way, is one of the most flavorful slaw dressings I've ever tasted. You can combine the cabbage with grated carrot and/or granny smith apples and it is even better. It had a lovely taste of Fall - and the promise of cool weather and harvest. . . .

Here's the recipe for Fall Slaw:

1/4 cup vinegar (red wine or cider)
1/4 cup sour cream
2 tablespoons sugar
2 tablespoons grated ginger root
2 tablespoons Dijon mustard (if you also have coarse whole-grain mustard, do half regular Dijon and half whole-grain)
2 teaspoons mayo
2 teaspoons soy sauce
1 teaspoon Worcstershire sauce
1 teaspoon celery seed
freshly ground pepper

Whisk it all together, and then whisk in just a bit of good olive oil at the very end (2 to 3 tablespoons, say). Pour the oil in slowly as you whisk, so it will emulsify. Stir in the slaw. It's even better the next day.